Part 17 - Learning MySQL for Beginners
Written by Eric Muss-Barnes, 28 December 2018This is definitely the most complicated lesson so far.
In this lesson, I will show you how to build a database.
What is a database?
A database is exactly as the name implies - it is a complex file containing an array of tabular information; a base of data. Typically this information is arranged in a spreadsheet-fashion, containing a myriad of fields. Sometimes, these tables of information will cross-reference other tables, and consequently, databases can become very sophisticated. There are many different types of databases and they use many different names. Microsoft uses SQL (pronounced "sequel") databases. MySQL (pronounced "my sequel") is a database used most often with PHP.
For this lesson, I will build a simple MySQL database, which displays information from a single table. I will also build an administrative interface which allows you to edit, delete and enter information into the database. Some computer nerds call this a "three-tier" database because it has three functions: Writing, Editing and Deleting.
Whatever.
It's a database. The whole "three-tier" thing is just more lofty nomenclature used by nerds to make themselves feel smarter than you. They aren't.
So, before we create our webpages, we need to build the database.
How do you build a database?
Your hosting provider should have information, when you log into your hosting account, to set up a database. Most of the PHP webhosting plans will use an interface called "phpMyAdmin" to create the database. In most cases, you will simply log into your web hosting account and find a section about creating a MySQL database. Remember, this database is going to be accessed using PHP, so you will need a PHP account to get this to work. Unfortunately, I can't tell you how to reach your "phpMyAdmin" interface, because every hosting provider will be different. But, once you get there, here is what you need to do...
PART 17 - LESSON A - CREATE A MYSQL DATABASE
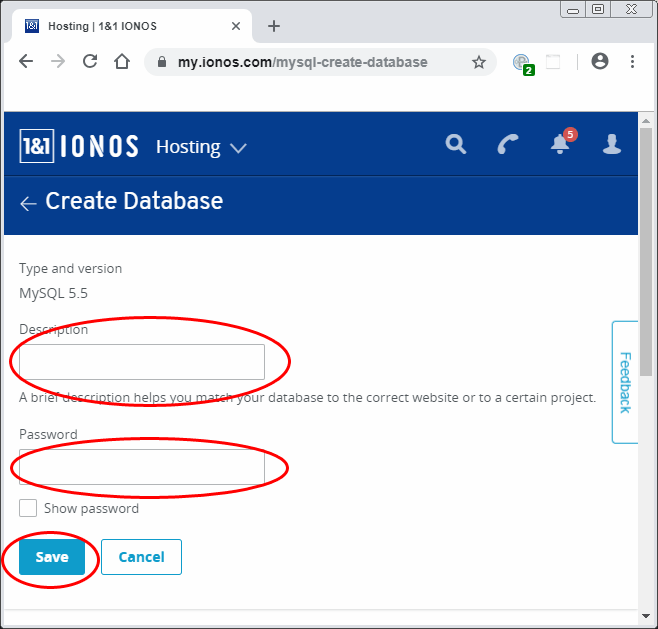
The first step is to give your new database a name and password, using an interface similar to the one shown below:
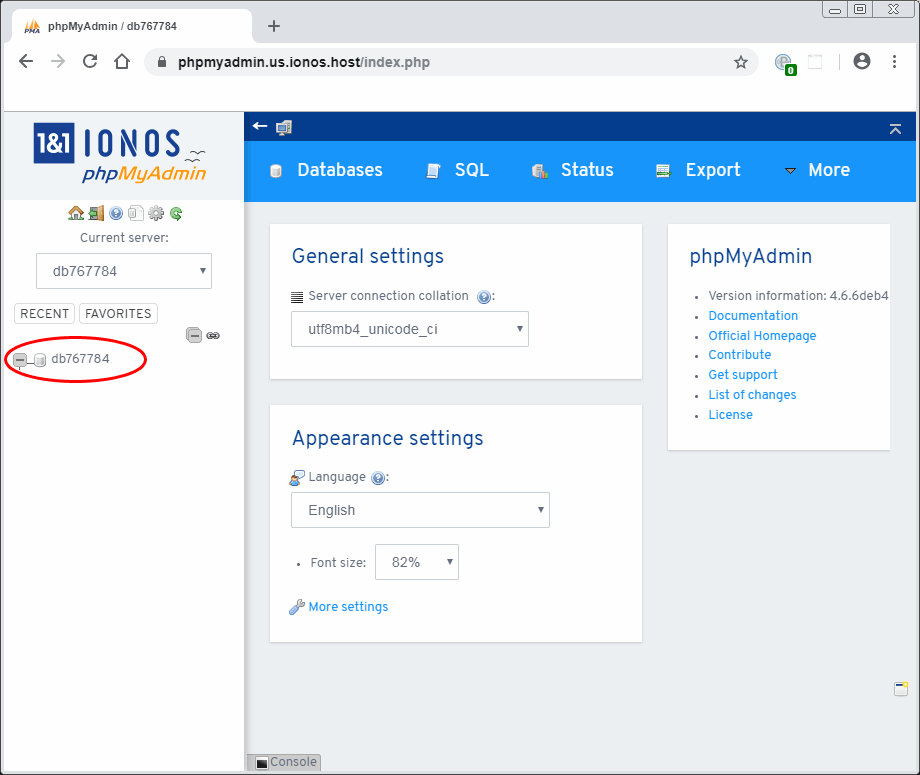
Now you have a database, but it's empty. There are no tables and no data in the database. Once your database is created, and you can access phpMyAdmin, you will see the name of your database in the left column, as shown below:
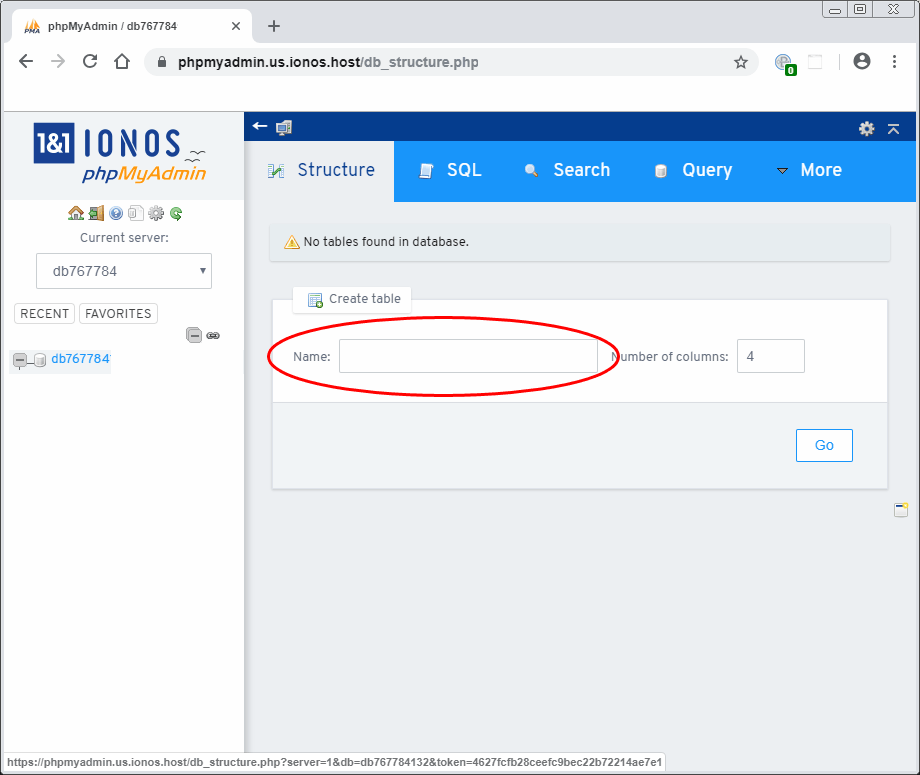
Right-click on the name of your database and create a new table. The first step is to give your new table a name, as shown below:
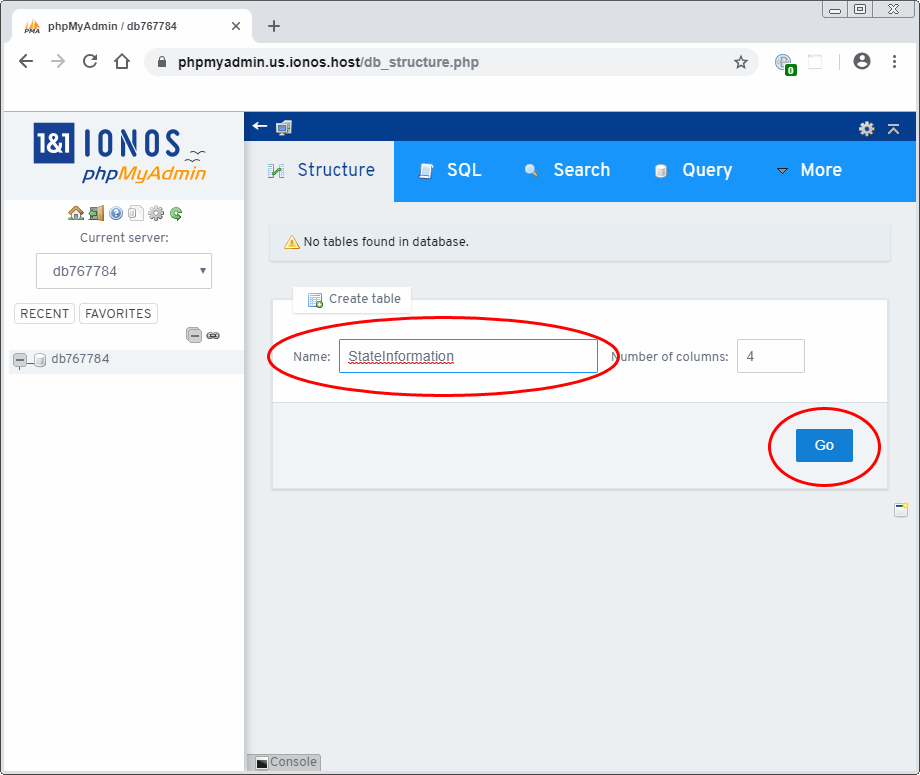
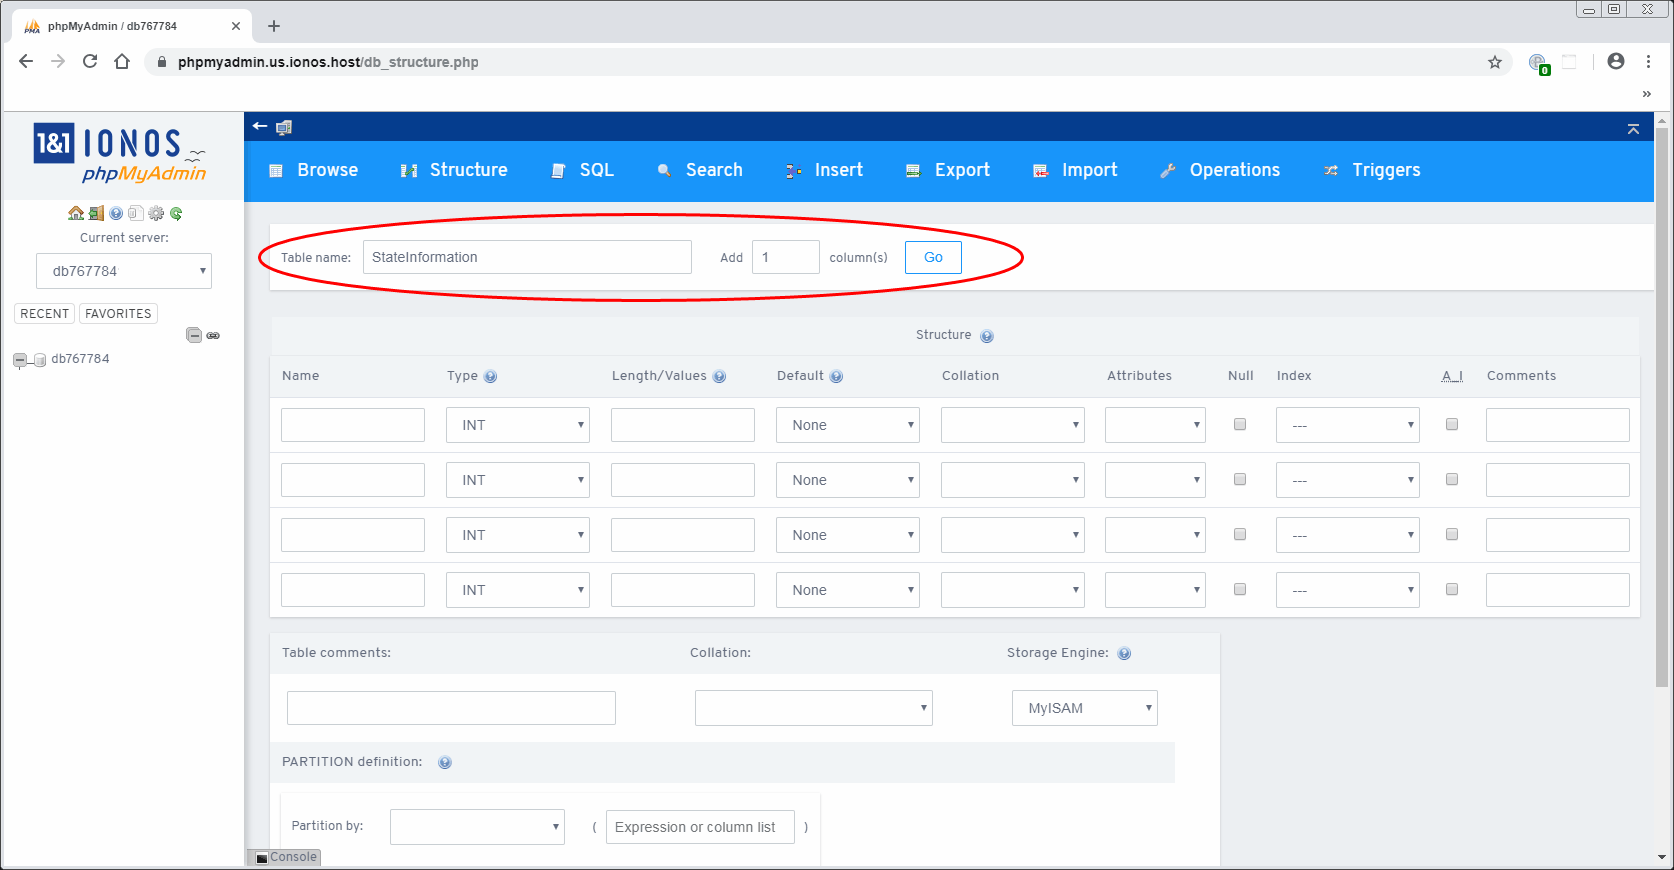
In this example, I'm going to create a table with information on the United States. So, I will call my table "StateInformation" and click the "Go" button, as shown below:
You will notice the default was to create 4 columns. I have decided that we should use 5 instead. So, after the table is made, I will add one extra column, as shown below:
Now that I have my table with 5 columns, I give each column a name, as shown below:
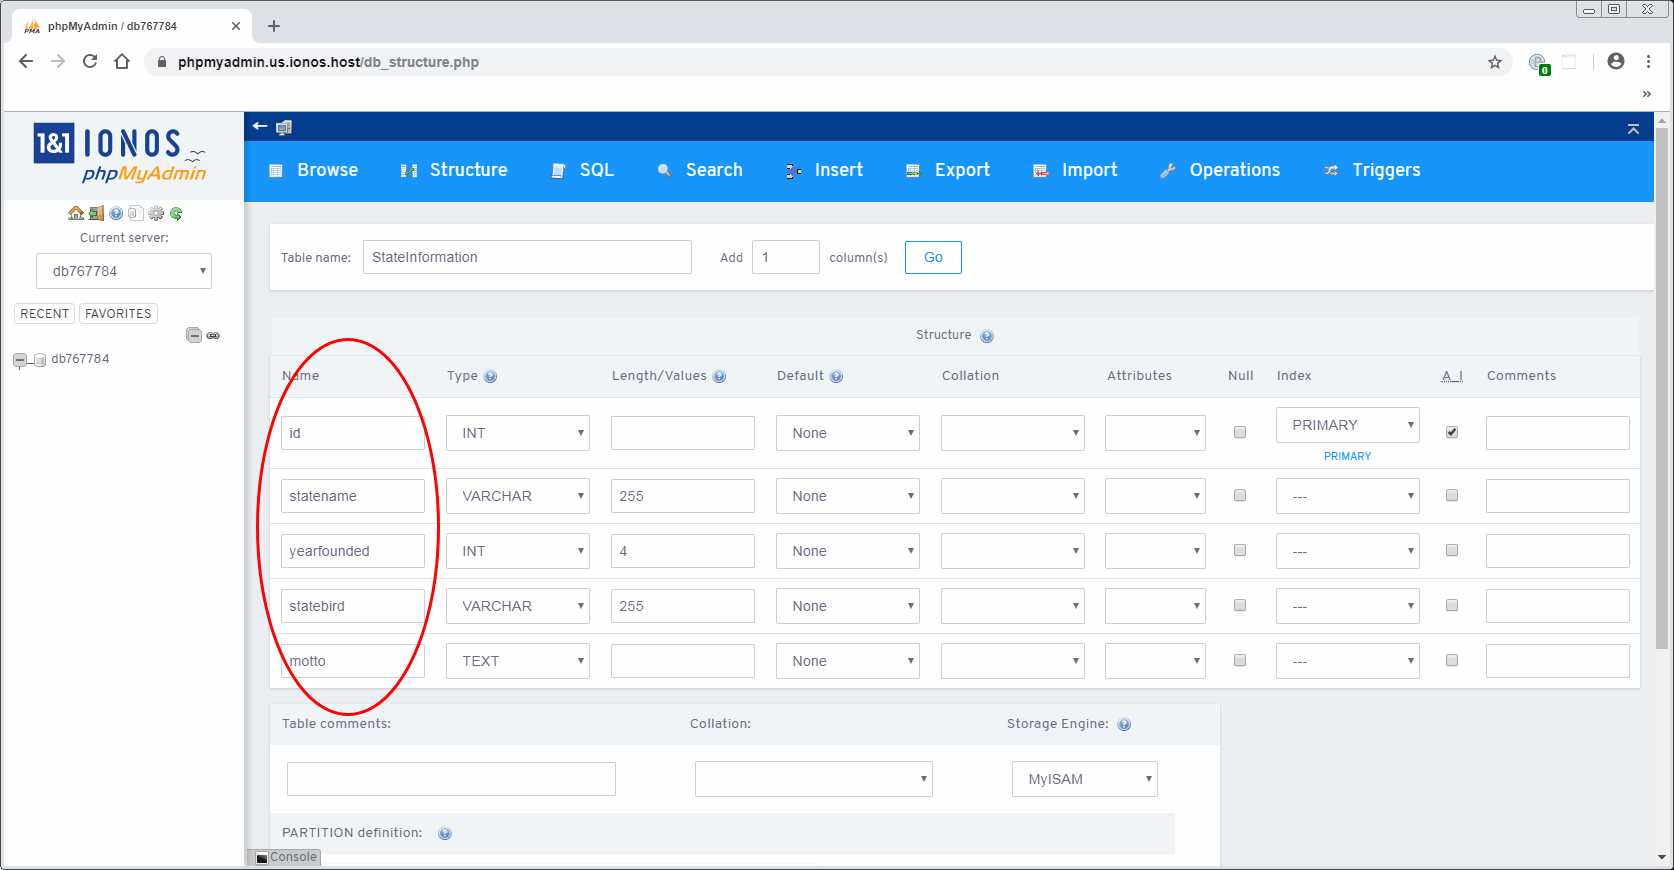
Notice there is a "Type" column as well. Numbers are "INT" which stands for "integer". The type "VARCHAR" is for words up to 255 characters in length. The type "TEXT" is large bodies of text and paragraphs. You will also notice the "id" column is marked as "Primary" an the checkbox for "auto increment" or "A.I." is checked. This is not necessary, but it is done in a database where you want every new entry to have a unique ID number:
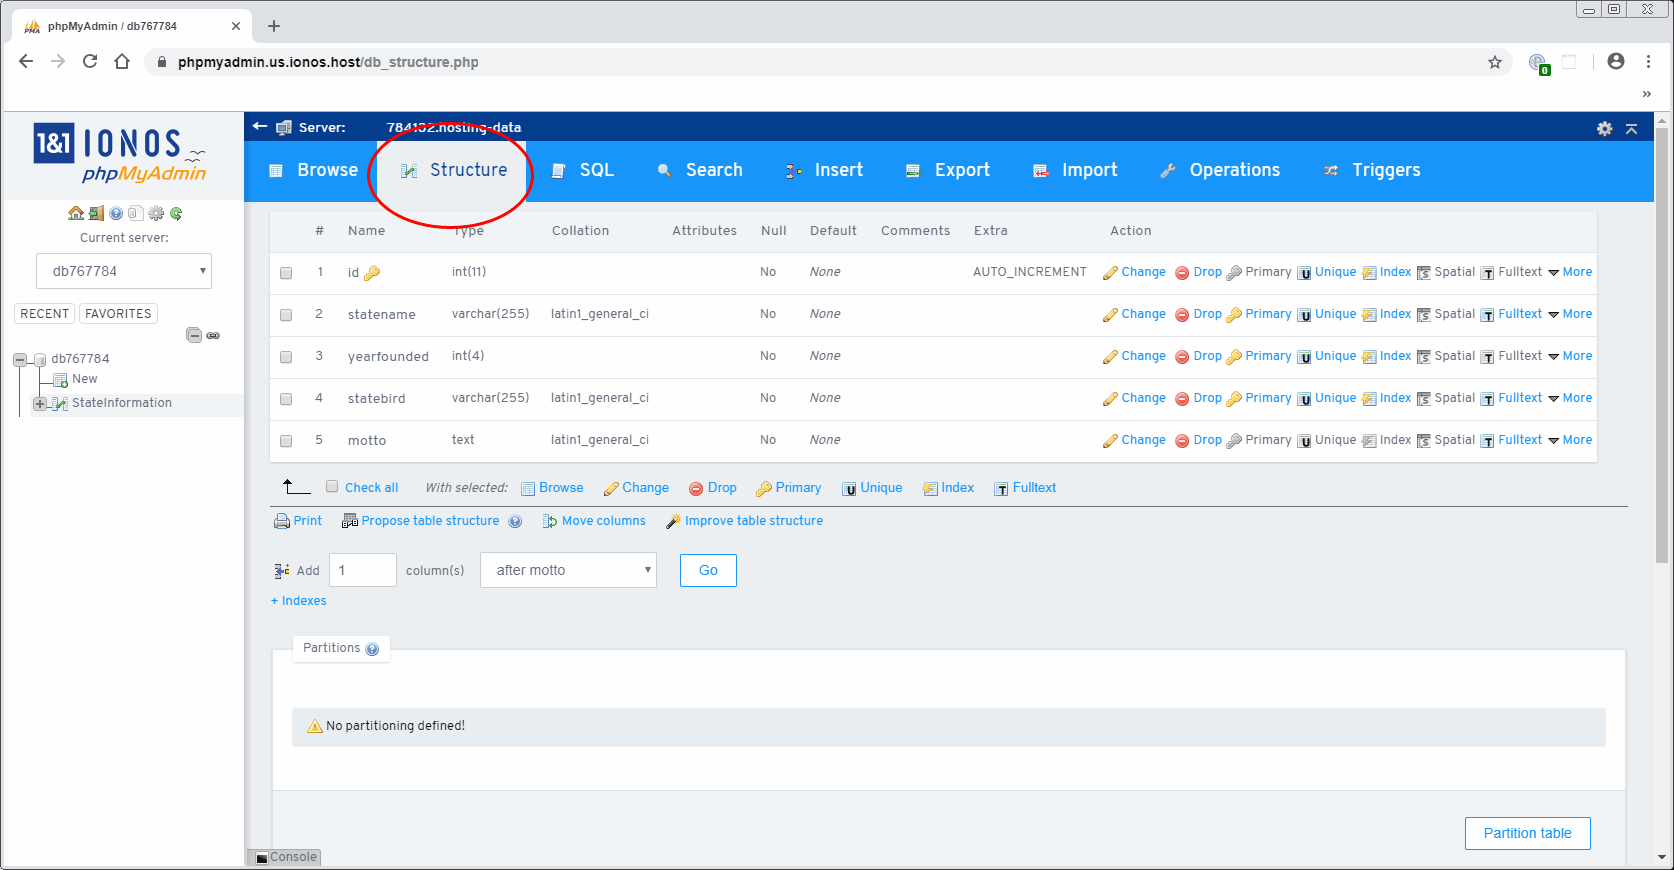
When you are ready to add data to your database, you can go to the "Insert" tab, as shown below, and fill out the form:
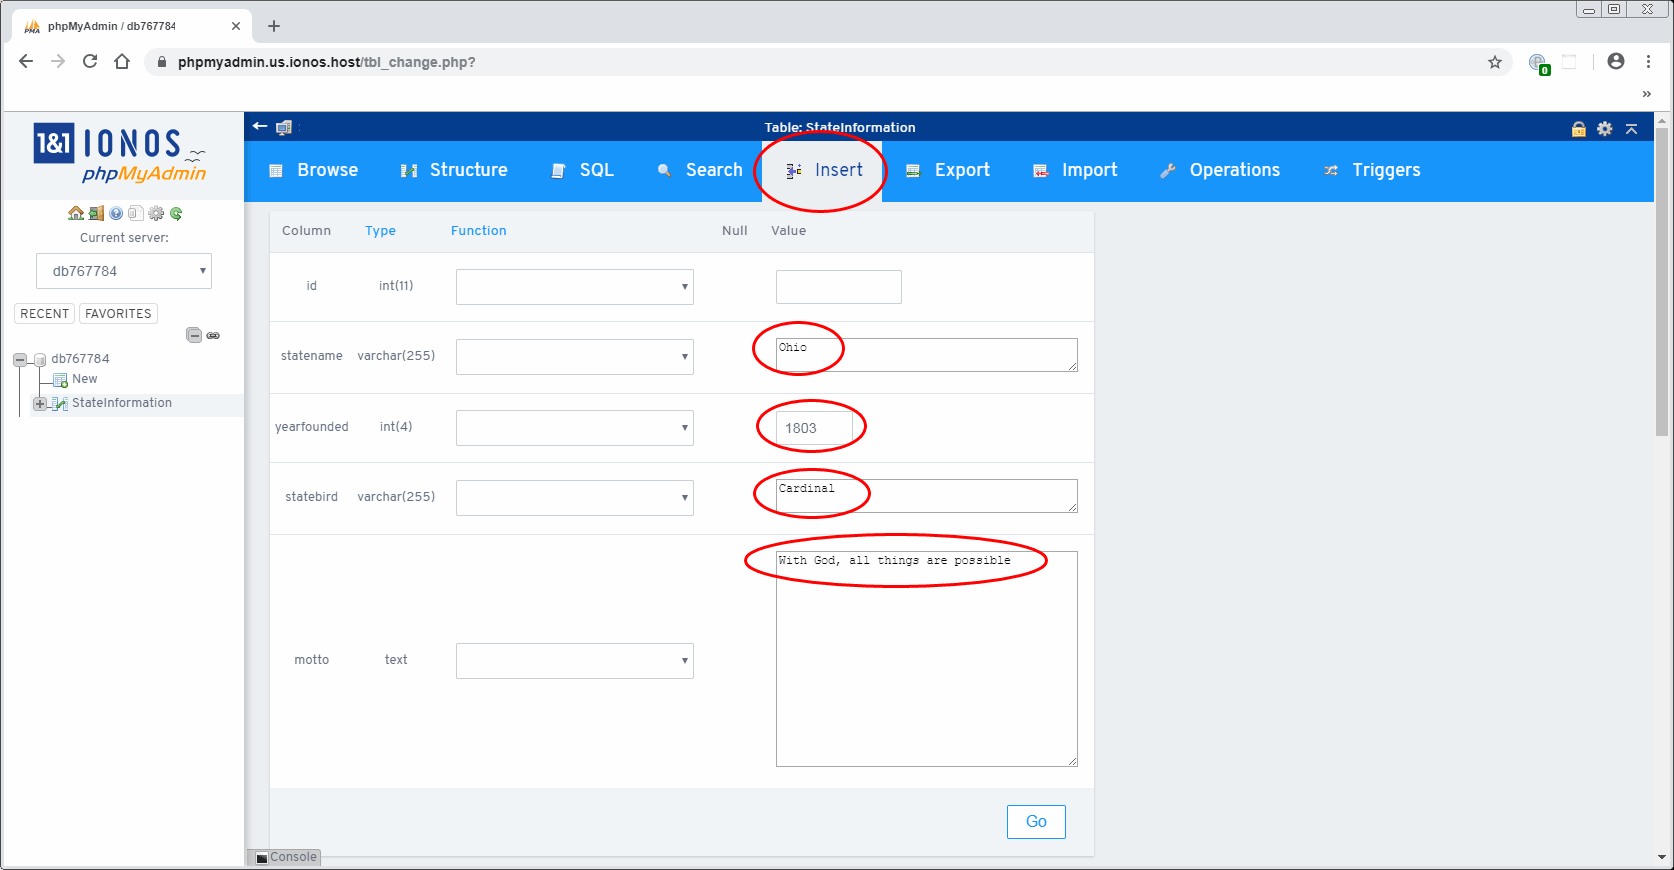
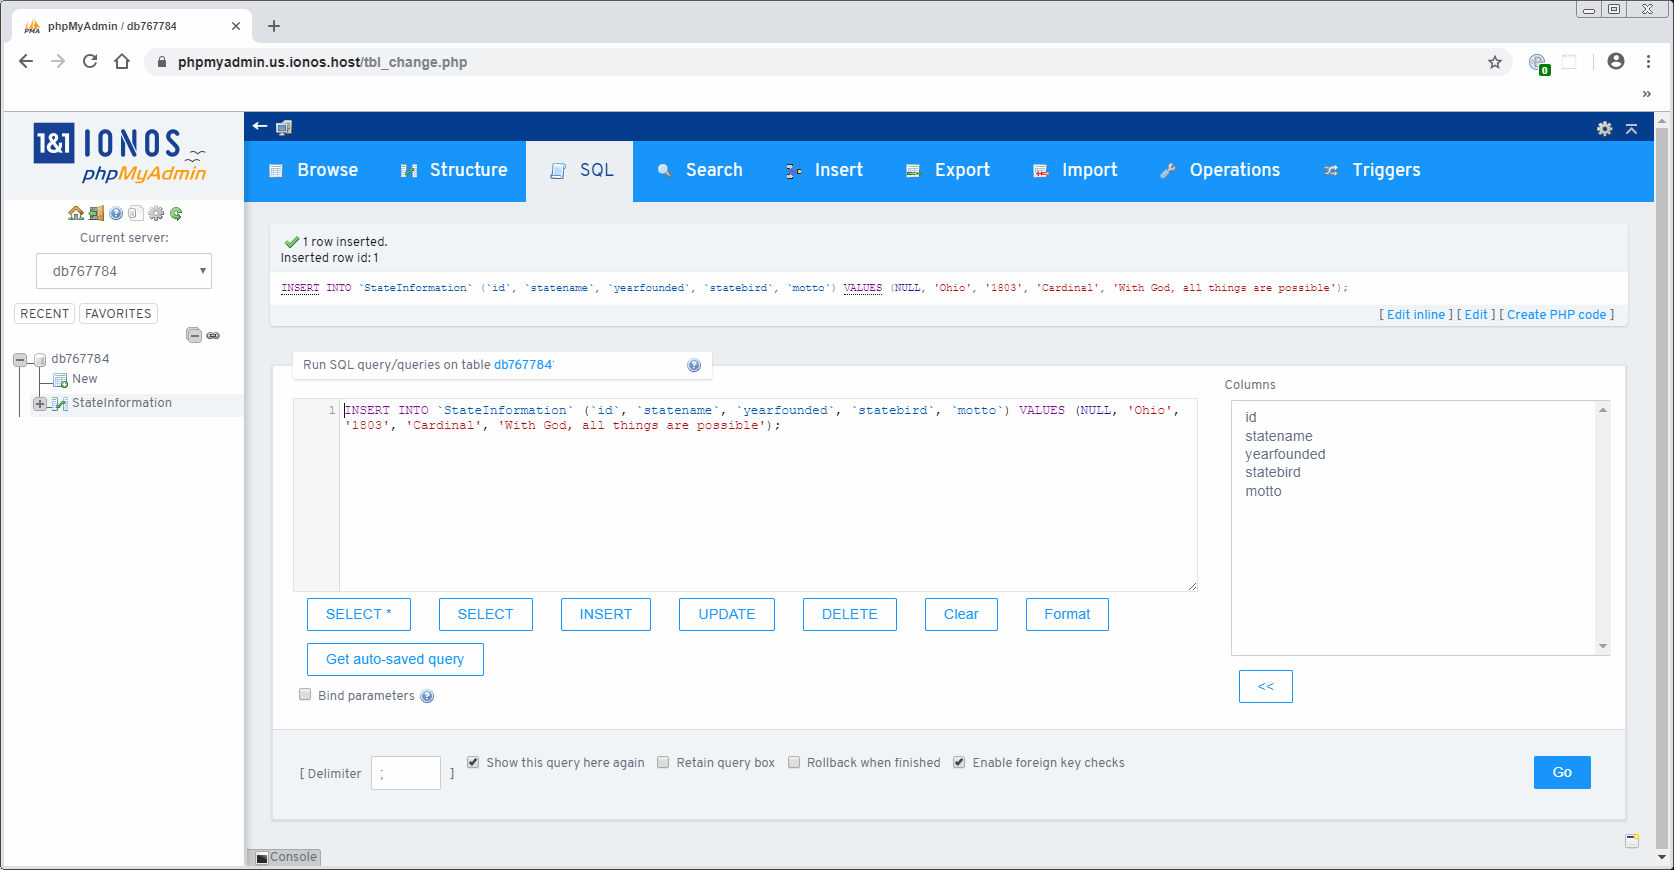
When hit the "Go" button, you will be shown the commands (called a "SQL query") which actually entered that information into the database, as shown below:
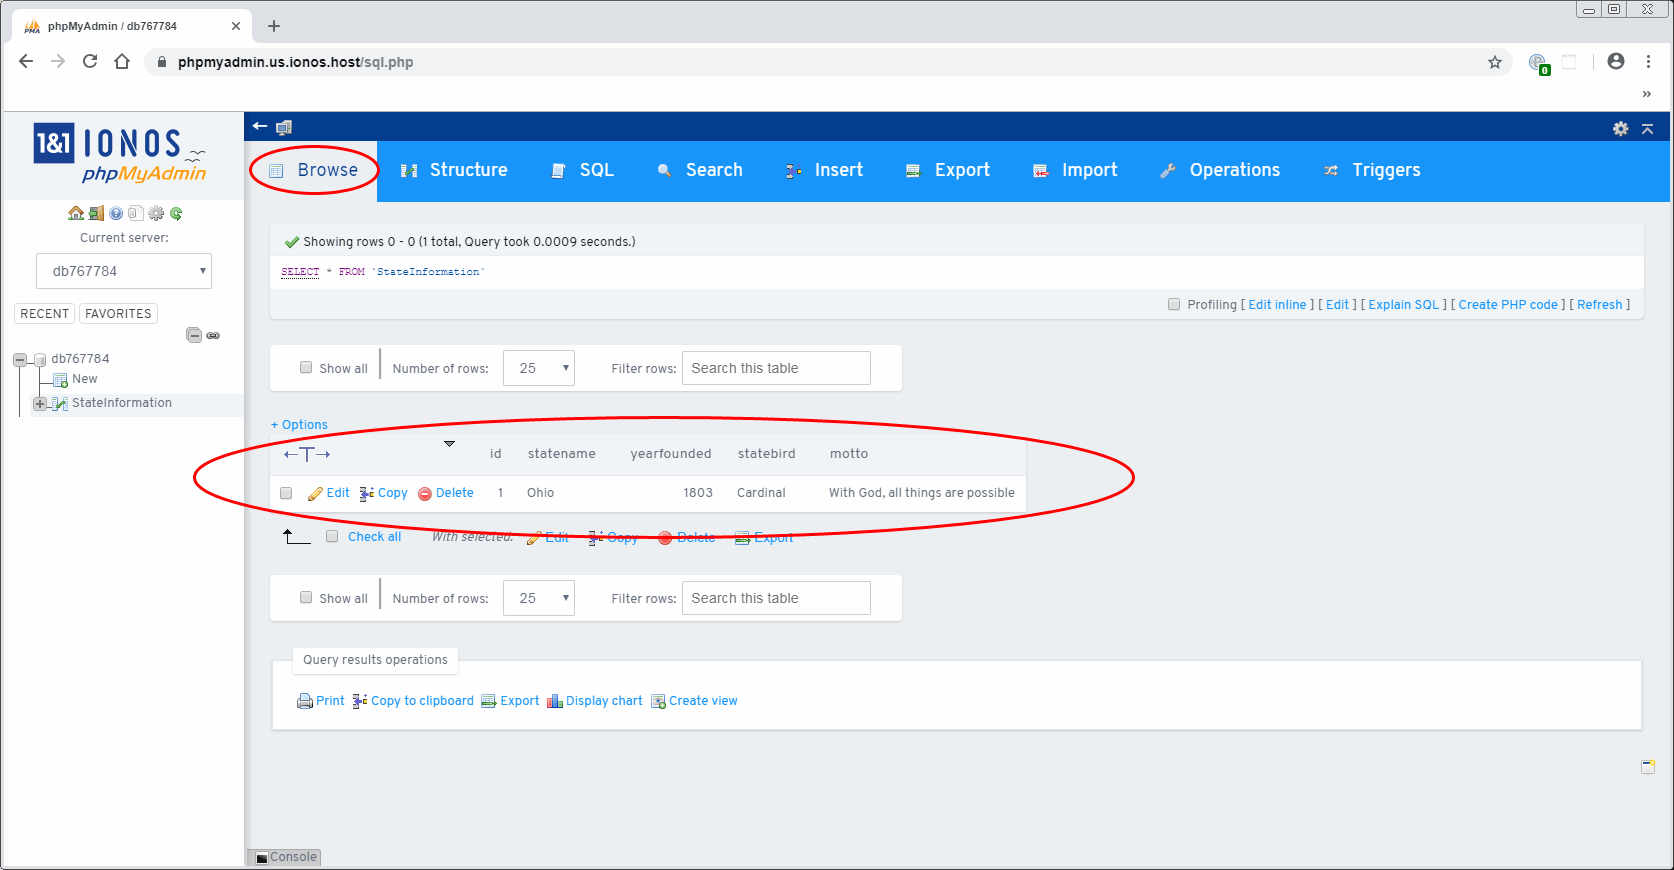
Once you put your first entry in the database, check the "Browse" tab and you should see the information appear, as shown below:
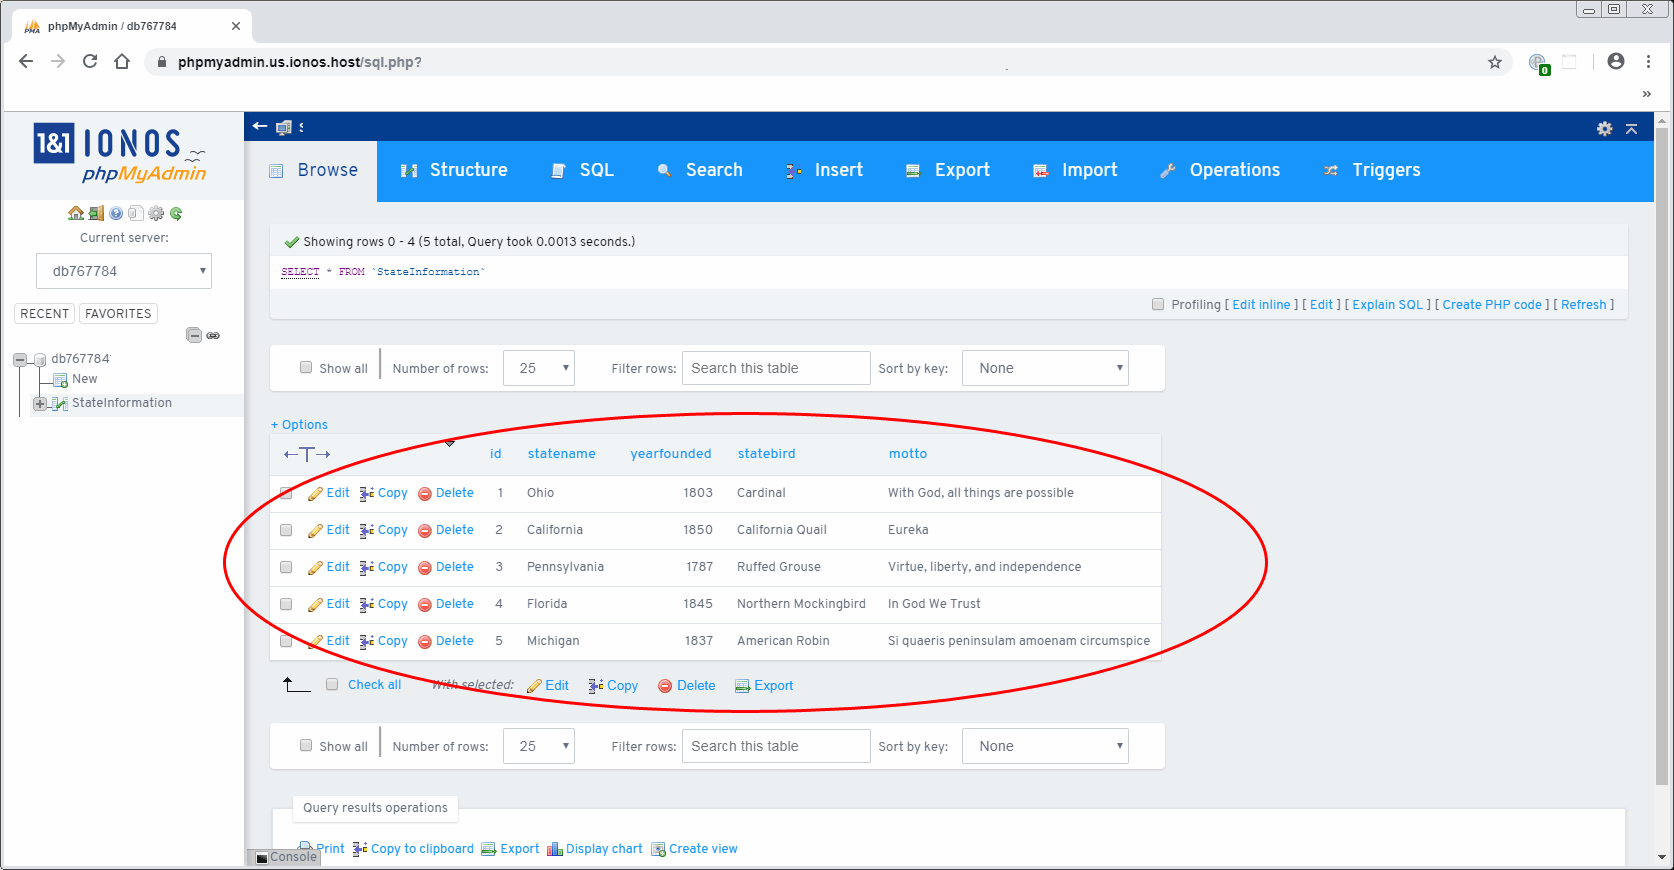
Repeat the steps under the "Insert" tab to add more information, and you will see it updated under the "Browse" tab, as shown below:
Now that we made a database, in the next lesson, let's build a webpage which will be able to read that data and display it.
PART 17 - LESSON B - DISPLAY DATABASE INFORMATION
For the sample code above, I am removing the actual database name and connections, so not just anyone can reach the database. But, you will still understand the basics of how it functions.
The next lesson will show you how to build a page that will allow you to add new entries into the database, plus how to edit or delete existing entries. This type of administrative page is often called a "CMS" or "Content Management System" and is the basis for websites like WordPress and Drupal. I have been building CMS applications like these since I first started programming, 28 years ago, in 1998. The concept is pretty simple, and by elaborating on the principals, you can build blogs and interfaces so your clients will have the power to edit their own websites, without knowing any code. Again, I don't want the database to be compromised by people entering bogus information, so it's not going to have actual database connections on the mysqli_connect line, but all the rest of the code will be genuine.
PART 17 - LESSON C - CONTENT MANAGEMENT SYSTEM (CMS)
Now you understand the basics of how to build a database and how to edit that information via a website interface. As I have mentioned in previous articles, for most websites, it will be quicker and easier to simply use XML, instead of a database. Databases are really only useful when you have a need to add, edit and remove data, or when you need to display massive quantities of changing data. However, if you just need to show a few items on a page, using XML is far more sensible.
And remember, kids, the world owes you nothing... until you create things of value.
Glossary
CMS
CMS is an abbreviation for "Content Management System" and is a web-based application for changing information on a website.database
A complex file containing an array of tabular information.MySQL
The most common type of database used with PHP.phpMyAdmin
An administrative interface used to create, edit and delete a MySQL database. phpMyAdmin is a web-based application that runs in a web browser.Downloads
Other Articles
